If you are fluent or close in Spanish, you can probably quickly learn how to ask if something has cheese, eggs, meat, milk, or butter in it (queso, huevos, carne/pollo/cerdo, leche, mantequilla), but Colombian cuisine necessitates asking about these as well:
1. Sustancia. (It's like chicken broth.) It's in almost EVERY soup in Colombia, with lentils being the only almost always safe one.
2. Crema. (cream) It appears in everything from potatoes to corn to dessert.
3. Mayonesa (mayonaise) is a common addition to veggies and salads.
4. Grasa (fat), which is basically added to all bean dishes that are specifically prepared vegetarian. Especially pork fat. Even if there is no meat in your bowl, there is almost always meat fat in the beans!
5. Gelatin is everywhere, appearing in candy, snacks, and many other things.
6. Leche en polvo, or powdered milk, also appears in many desserts and snacks.
7. A lot of bread, especially from bakeries, has eggs, butter, or milk. Even though they look enticing, the famous Colombian bunelos are made with cheese and butter, so either avoid them or be prepared for a stomach ache.
So, what should you avoid? Well, if you don't speak much Spanish, I would say that it's best to avoid breads that you can't read an ingredient list for, all other baked goods, most candy, almost all soups, and a lot of the side dishes. Obviously, avoid meat and cheese dishes. Also, beware, a lot of the food sold on the street can make you sick, so it's best to buy it and make it yourself or buy it from/have it made by someone you know is practicing good hygiene. Rice is generally safe, and other safe foods are listed in this blog post.
Showing posts with label food. Show all posts
Showing posts with label food. Show all posts
Tuesday, November 23, 2010


Vegan Packing List & Grocery Shopping List for Colombia
Things to pack:
If you are coming to Colombia for a long time, will have access to a kitchen, and can bring food with you, these are my suggestions...
1. Ground flax seeds. Use as egg replacer.
2. Ener-G Egg replacer
3. Real Vanilla (okay, everyone should bring this...)
4. Protein bars or powder, although you can find both here
5. Vital Wheat Gluten flour. Use to make seitan, chickpea cutlets, vegan sausage, etc.
6. Peanut butter or other nut butters, and a lot of it!
7. Any of your favorite vegan "crave" foods that might be difficult to find. For me, it was dried cranberries.
8. Spices! Chili powder, fennel, red pepper flakes... these tend to be hard to find.
Grocery locations:
These places are where I find most of my groceries in Pereira...
1. Tofu-Exito, vegetarian restaurants with weird hours downtown
2. Soymilk- Silk at Exito, Ades at all other stores
3. Protein powder- Soy Plus, all well-stocked supermarkets
4. Veggies and Produce- the best variety is usually found at La 14. Carrefour is the cheapest but runs out faster.
5. Organic amazing fresh basil-Carrefour
6. Canned chickpeas-Exito, La 14
7. Fat free refried Old El Paso pinto beans: Exito
8. Spices: La 14
9. Fresh bread: bakeries at Carrefour and Exito
10. Lee Kum Kee Terriyaki Sauce: La 14 and Carrefour
11. Low sodium, high quality soy sauce: Carrefour
12. Other vegan canned beans: La 14
13. Santander chocolate: La 14, Exito, sometimes Carrefour
14. Wine: Alkosto (cheap)
15. Peanut butter--Carrefour, but it is massively and prohibitively expensive to be a regular grocery item
For good beer, only Carrefour has European brews. Warren wanted everyone to know...
If you are coming to Colombia for a long time, will have access to a kitchen, and can bring food with you, these are my suggestions...
1. Ground flax seeds. Use as egg replacer.
2. Ener-G Egg replacer
3. Real Vanilla (okay, everyone should bring this...)
4. Protein bars or powder, although you can find both here
5. Vital Wheat Gluten flour. Use to make seitan, chickpea cutlets, vegan sausage, etc.
6. Peanut butter or other nut butters, and a lot of it!
7. Any of your favorite vegan "crave" foods that might be difficult to find. For me, it was dried cranberries.
8. Spices! Chili powder, fennel, red pepper flakes... these tend to be hard to find.
Grocery locations:
These places are where I find most of my groceries in Pereira...
1. Tofu-Exito, vegetarian restaurants with weird hours downtown
2. Soymilk- Silk at Exito, Ades at all other stores
3. Protein powder- Soy Plus, all well-stocked supermarkets
4. Veggies and Produce- the best variety is usually found at La 14. Carrefour is the cheapest but runs out faster.
5. Organic amazing fresh basil-Carrefour
6. Canned chickpeas-Exito, La 14
7. Fat free refried Old El Paso pinto beans: Exito
8. Spices: La 14
9. Fresh bread: bakeries at Carrefour and Exito
10. Lee Kum Kee Terriyaki Sauce: La 14 and Carrefour
11. Low sodium, high quality soy sauce: Carrefour
12. Other vegan canned beans: La 14
13. Santander chocolate: La 14, Exito, sometimes Carrefour
14. Wine: Alkosto (cheap)
15. Peanut butter--Carrefour, but it is massively and prohibitively expensive to be a regular grocery item
For good beer, only Carrefour has European brews. Warren wanted everyone to know...
Thursday, November 11, 2010
Things that are basically always vegan in Colombia, unless otherwise noted.
Vegans can almost always eat or drink:
1. Juice (jugo) except that you nearly always need to specify jugo con agua, because a lot of places like to put milk in it, making it jugo con leche. I recommend lulo, mora, naranja, and maracuya.
2. Lentils (lentejas). Lentil soup is naturally vegan in Colombia, except in resaurants and homes that like to make things fancy and add chorizo. So, just ask if you are in doubt: Tiene carne o pollo o chorizo o sustancia? If they say no, you´re good to go.
3. Fruits and veggies, although I generally don´t think it is a great idea to eat any of the fruit sold at street vendors, solely because most of them do not wear gloves or wash their hands and I have gotten sick too many times.
4. Some crackers sold in Supermarkets. Most Dux and Club Crackers are okay. Almost no granola bars are. Read the ingredients. Avoid anything with huevos, leche, mantequilla, queso or gelatin.
5. Santander 70% dark chocolate. This is very important.
6. Rice (sometimes it has butter, which is mantequilla, or milk, which is leche.) I like coconut rice best, which is arroz de coco.
7. Salads without dressing (or only oil, which is aceite, and vinegar, which is vinagre).
8. Most versions of plantains, including platano maduro, patacon, and tostones. When ordering a giant patacon (like in Salento), the best vegan topping is a mixture of pina and pimenton, but it goes by different names. Just ask for it. Platano maduro is sometimes served with butter or cheese, so just ask if it has queso. (Tiene queso o mantequilla?) Tostones should be fine no matter what, but avoid eating most Colombian guacamole, because they put mayonaise in it (generally speaking, it is okay in most Mexican restaurants though.)
9. Canned beans in the supermarket that are ONLY beans... basically just garbanzos. Always read the ingredients, and avoid anything called manteca de cerdo or other meat.
10. Fruit popsicles at Mimo´s.
11. The refried beans at many Mexican restaurants.
12. Falafel at most Arabic resaurants.
13. Things you cook yourself.
1. Juice (jugo) except that you nearly always need to specify jugo con agua, because a lot of places like to put milk in it, making it jugo con leche. I recommend lulo, mora, naranja, and maracuya.
2. Lentils (lentejas). Lentil soup is naturally vegan in Colombia, except in resaurants and homes that like to make things fancy and add chorizo. So, just ask if you are in doubt: Tiene carne o pollo o chorizo o sustancia? If they say no, you´re good to go.
3. Fruits and veggies, although I generally don´t think it is a great idea to eat any of the fruit sold at street vendors, solely because most of them do not wear gloves or wash their hands and I have gotten sick too many times.
4. Some crackers sold in Supermarkets. Most Dux and Club Crackers are okay. Almost no granola bars are. Read the ingredients. Avoid anything with huevos, leche, mantequilla, queso or gelatin.
5. Santander 70% dark chocolate. This is very important.
6. Rice (sometimes it has butter, which is mantequilla, or milk, which is leche.) I like coconut rice best, which is arroz de coco.
7. Salads without dressing (or only oil, which is aceite, and vinegar, which is vinagre).
8. Most versions of plantains, including platano maduro, patacon, and tostones. When ordering a giant patacon (like in Salento), the best vegan topping is a mixture of pina and pimenton, but it goes by different names. Just ask for it. Platano maduro is sometimes served with butter or cheese, so just ask if it has queso. (Tiene queso o mantequilla?) Tostones should be fine no matter what, but avoid eating most Colombian guacamole, because they put mayonaise in it (generally speaking, it is okay in most Mexican restaurants though.)
9. Canned beans in the supermarket that are ONLY beans... basically just garbanzos. Always read the ingredients, and avoid anything called manteca de cerdo or other meat.
10. Fruit popsicles at Mimo´s.
11. The refried beans at many Mexican restaurants.
12. Falafel at most Arabic resaurants.
13. Things you cook yourself.
Monday, November 8, 2010
Vegan Chocolate Cake (easily made in Colombia)

I promised a post, and I'm going to deliver! With photos!
This is a very moist and fairly chocolate-y cake, especially considering how amazingly accessible the ingredients are. I imagine it would be easy to duplicate this cake almost anywhere in the world. Well, anywhere that has an oven. (Although, since the batter is vegan, you could just eat the raw cake batter. Mmmmm.) The best thing about this cake is that it is SUPER easy and contains really normal ingredients, so it is a great cake to make any time, even if you aren't vegan. Also, it avoids most allergies (except gluten!), so it's pretty friendly. It's low fat if you use the orange marmalade because you can use less oil... Plus, it's delicious. The texture is somewhat like a light brownie.

Essential equipment for vegan baking in Colombia:
 a measuring cup
measuring spoons
whisk
2 mixing bowls
heaving spoon (plastic or wood) to do heaving mixing
Although it isn't essential, I highly recommend a spring-form pan for this cake. Just like a cheesecake, it's very moist and dense, so it would fall apart if you tried to remove it from the pan, and just like a cheesecake, it is prettier when you can see the sides. Obviously, it is up to you, but if you want a 12 inch spring-form pan, I know they sell them at La 14.

Moist Vegan Chocolate Cake, Egg-free, Dairy-free
Here's the basic recipe:
2 cups flour (harina de trigo)
1 cup cocoa (cocoa en polva--my favorite brand is Luker)
1 teaspoon salt (sal, I like sea salt best. It's called sal marina)
2 teaspoons baking soda (bicarbonato)
1 cup of white sugar* (azucar blanco)
1 cup of brown sugar** (azucar moreno)
2 teaspoons white vinegar (vinegre blanco)
2 teaspoons (at least) of vanilla (again, I can only find the fake stuff here, but it's called vainilla)
1 3/4 cups soy milk (leche de soya. I recently discovered that Exito marked down the price of Silk, and Silk changed its packaging so it is in Spanish on one side. Check near the cereal aisle. I prefer Silk Unsweetened Natural.) You can sub water for this if absolutely necessary. I wouldn't. You could also sub orange juice. That might be a bit better.
1/4 (maybe a bit more) of juice from fresh oranges
2 tablespoons of canola oil
1/2 cup orange marmalade (mermelade de naranja, my favorite brand is La Constencia)
3 tablespoons (or more!!) of shaved unsweetened table chocolate. I used about 2 squares of Luker.
*I think it is vegan here because the kind I buy is very unprocessed, but using only brown sugar, which is actually turbindo sugar in Colombia, would not hurt a thing.
** If you like a very sweet cake, go ahead and use 2 cups of sugar. If you like a slightly more bitter cake, I would definitely recommend cutting down the sugar to about 1 1/2 cups, maybe even a tad bit less.
Directions:
1. Add flour, cocoa, salt, and baking soda to a mixing bowl. Mix thoroughly with a whisk to get rid of clumps OR sift.
2. In a measuring cup, measure the soy milk. Add the orange juice to the soy milk and stir. Dump in another mixing bowl (not the one with the dry ingredients!).
3. Add the oil, vanilla, vinegar, and canola oil to the soy milk mixture. Then add the sugar. Whisk until it is well-blended. Then, add the orange marmalade. Stir.
4. Add the wet ingredients to the dry ones. It should bubble a bit because of the chemical reaction between the baking soda and vinegar. Stir to incorporate, and then whisk until completely blended.
5. Add Luker shavings. Stir well.
6. Pour batter into a greased and floured baking sheet (9 x 13, 2 small loaf pans, or a 12 inch round pan).
10. Bake at 350 degrees F. Depending on the size of your oven and the size of your pan, this could take anywhere from 20 minutes to 45. Check on it often. The top should set (it shouldn't wiggle if the pan is shaken), and a toothpick should come out relatively clean (read: crumbs okay, raw batter not really) when inserted into the center.
11. Let it cool, and then top it with this quick icing:
 Melody's best icing:
1/2 cup cocoa powder
1/3 cup powdered sugar (you can make this, look up a recipe online, or buy it... azucar pulverizada)
1 teaspoon vanilla
1 tablespoon soy milk (may need more)
Sift cocoa powder and powdered sugar together. Stir well. Add vanilla and soy milk. Whisk. You might need to add more soy milk, but whisk really well before you do. It should be about the same consistency as liquid dish soap--easily pourable and spreadable. Pour it onto your cake and spread it with a knife. It will set quickly, so if you want to add toppings do it now. For this cake, I added coconut (coco) and Oreos, which are vegan if you eat white sugar. (They don't have Newman O's in Colombia.)
It makes a cute birthday cake!

Variations:
Orange-Chocolate: You can make this extra orange-y by adding shaved orange peel to the batter and using more orange juice to replace some of the soy milk. You can also use orange juice instead of soy milk in the icing, and then you can top it with orange peel.
Chocolate-coconut: Replace up to one cup of the soy milk with coconut milk, or simply reduce the vanilla to 1 teaspoon and add 2 teaspoons of coconut extract. Sprinkle with coconut.
Chocolate-strawberry: Use strawberry (fresa) jam instead of orange marmalade.
Plain old chocolate: Use 2/3 cup canola oil, get rid of the 2 tablespoons and don't use orange marmalade. Add another tablespoon of shaved chocolate to the batter, an extra 1/4 teaspoon salt, reduce sugar to 1 1/2 cups, and add an extra tablespoon of vanilla.
 I made this YESTERDAY, and between my friends, my masseuse, Warren, and me, almost half of it is gone!
Sunday, September 19, 2010
Melody's Guide to Being Vegan in Colombia: Introduction

Welcome to the beginning of a series of posts about being vegan in Colombia... and let it be known before you read this post that I totally get/understand/don't need to be told that veganism is a choice. It is a personal choice I made over three years ago, but certainly one that I'm freely able to change my mind about. I get it. Don't attack me for it, okay? The point of this post is to talk about something near and dear to me: the challenge of being vegan in Colombia, and how to overcome said challenge.
I really do love Colombia, even when I complain about my job and the other frustrating things that happen here. It's a beautiful country full of truly wonderful people, and I absolutely encourage people to travel here and experience it.
Despite this, Colombia is a very, very difficult place to be a vegan, and even a fairly difficult place to be a vegetarian. The main reason for this is that people don't even really understand vegetarianism, and so veganism is something that confuses most Colombians. This isn't because they are stupid or anything, it's because it is very uncommon for people to be vegan/vegetarian here. Vegetarians in Colombia come in many different versions, too. Some people consider themselves vegetarians if they only avoid red meat. Many vegetarians still consume sustancia (chicken broth) and other kinds of animal products, like gelatin and beef juices. A lot of vegetarians do avoid meat and meat by-products, like broth. Even so, people who work in the food business will not understand exactly what vegetarianism is, generally speaking. For example, if you order beans, there's an extremely high chance that they were cooked with meat. They might not have meat IN them, but they might have been cooked with a bone or meat juices or just big chunks of pork fat. This is very typical, and generally it is safe to assume that most beans served in restaurants are not safe for vegetarians to eat. I've ordered beans before that the cooks swore did not contain meat, and there was a big chunk of pork in my bowl when they were served.
In the States, if I didn't have a lot of time to make a meal, or if I just didn't want to do a lot of prep, there were always lots of alternatives. I could easily eat out, even at a fast food place like Taco Bell (not healthy, but definitely convenient), I could grab a carton of packaged hummus, I could buy a frozen Amy's burrito from almost any grocery store, or I could even cook something using packaged foods, like canned beans or fake meat. Even tofu is less work in the States because you can get it at almost any Thai restaurant OR you can buy packaged, flavored, and pre-cooked tofu at a health food store. At that was in Springfield, not New York City or Portland. In Colombia, being vegan or vegetarian requires a lot of work. It takes a lot more effort to get the necessary amount of protein and calcium in my diet here. It can be exhausting and frustrating to constantly be prepping food just to meet my nutritional needs.
During the next food days I will be posting about what foods to avoid, what foods to eat, where to find vegan products, what to bring to Colombia from the States if you are vegan, vegan recipes, and how to ask questions in Spanish that will help you survive as a vegan in Colombia.

At the Chicago Diner for my birthday last year. Best restaurant ever.
Monday, June 7, 2010
Perks of Living in Colombia
 Last summer I had already accepted a position at a school in Seoul when we arrived in Colombia for a 6 week volunteering experience at LPV. I was very nervous about the position in Korea and frequently worried that I had made the wrong decision. At the time, our supervisor at LPV continuously hinted that perhaps we should consider getting jobs in Colombia instead. At some point, Warren and I both began listening to her and started considering it an actual possibility.
It didn't take us long to decide that we would rather spend a year in Colombia than a year in South Korea. Although I'm sure Seoul is a fabulous place and I think I would have enjoyed it, it was comforting to accept a job at a school where I already knew my boss. I had seen the school and lived in the city where I would be moving. As much as was possible, I knew what to expect. We agreed to return to the school in January as full time teachers. It meant moving back to the States for 1/2 a year, during which time I taught and worked at my old job.
Now that I've been here for exactly 5 months, I'm positive we made the right decision. Things can be tough here, but there are many perks to living in this country and working at LPV. While I know I would make more money if I could find a full-time job in the USA, I make a lot of money by Colombian standards and live very well here. We have a lovely apartment with nice furniture, and our building is fantastic. I have full-coverage health insurance, so when the doctor made a house call at 2 a.m. Saturday night, I didn't pay a cent. I get random holidays (like today) off while my fellow Americans are hard at work. (Next week is a 3 day weekend, too. HA!) Also, I get to experience another country and culture, which is priceless.
Even so, it's easy to forget those things when you work 47+ hours a week and then spend your evenings grading and writing finals, and I'll forget how lucky I am until I talk to a friend on Skype and they mention how pretty our flowers are.
They are pretty. The flowers at the top of the page are from La 14, and they cost $2.50. That's definitely a perk. Another perk is that I get regular pedicures here and never pay more than $6, including a good tip. We can go swimming almost any week of the year here, and we actually have a pool so that's possible. I've been growing fresh basil since February, when most Americans were shivering, not gardening. We live in possibly the best climate zone in the world--always in the 65 to 92 degree F range and no humidity because of the mountains. It's hard to beat this weather. The country is also beautiful--mountains, hillsides of coffee, tropical flowers, and palm trees are all just part of the view from our apartment or from my classroom. OH--and I suppose that working in a place like LPV has plenty of perks, too. For example, on Saturday someone had a wedding at the school. While we were there for our teachers' meeting people were running around and setting up chairs and things. Please think about your grade school. Would you have planned a wedding there? I certainly wouldn't at mine. LPV is a gorgeous place to work, and because I'm basically outside in the forest all day, I know I'm getting plenty of fresh air.
 Another great perk that I often forget about is the year-long abundance of fresh produce. I made this pasta for lunch today. I threw it together quickly, with leftover bruschetta topping from Saturday night, random veggies, beans I had pre-cooked for minestrone, and a few handfuls of pasta. It was super healthy, super quick, and super easy. As I was eating it, I realized that the only "packaged" foods in the entire thing were pasta and olive oil. I made the tomato sauce from scratch using a mountain of tomatoes. The spinach was organic spinach I forgot to put in the minestrone. The basil was grown on my porch. The whole dish probably cost less than $5 to make, and as you can see there is a lot left. In the United States, this would be an expensive dish. I would probably have used canned diced tomatoes, packaged basil, and canned beans. It would have been full of preservatives and unnecessary sodium. More importantly, it wouldn't have been as healthy or as tasty.
There are a lot of perks to living in Colombia, but perhaps the best one is that it's good for my health. I get lots of fresh air, sunshine, and tons of healthy fruits and veggies.
I'm just going to guess that wouldn't be the case if I lived in downtown Seoul, although I have heard kimchi is extremely healthy. Oh well!
Friday, May 21, 2010
Vegan in Colombia

Above: a typical Paisa lunch... bandeja paisa.
On Wednesday, I walked into my classroom and one of my favorite students looked at me with a sad, worried look and said, "Miss Melody, I forgot you are a vegetable."
"A vegetable?"
"Yes," she said, "I brought you some of my birthday cake, but you can't eat it because it has eggs and milk."
"But, am I a carrot or a piece of broccoli?" I countered.
"What?"
"Don't worry, (insert name here), we can give the cake to Warren. He LOVES birthday cake," I said, since she seemed so worried.
Being vegan in Colombia is challenging, and that's an understatement. This past week at school I didn't even each lunch two days because there wasn't anything to eat. Lentil days have become few and far between, and they started putting bacon in the beans whenever they serve them.
There is one other vegetarian at LPV, but very few people understand what veganism is. I'm often offered chicken or soup with chicken broth. The school cafeteria is also a little lax about cross-contamination, so I've found meat in my veggies before.
I'm really not complaining about the school, though. I chose to be a vegan almost 3 years ago, and I knew when I moved here it was going to be a challenge. I deal with it and don't stress. Veganism is a choice I made to help the environment and for my health, but I totally get that it is weird and abnormal. I'm not judging anybody.
Although it's a weird thing to teach, I'm pretty sure my students will understand veganism at the end of the year, simply because they are always offering me bites of their arepa burgers or their ice cream, and then want to know why I turn them down.
Also, because we live in a small city and it's extremely difficult to find the things I depended on at home for easy meals, I've become a more creative and resourceful cook. It's been a fun, albeit slightly difficult, challenge. The world should know: as long as you have your own kitchen (and no maid/cook), it is totally possible to be vegan in Colombia. It just might take a little more effort and a lot of resourcefulness.
Oh-and when people forget you are a vegetable, just shrug and ask if you are looking like a red pepper that day.
Thursday, May 13, 2010
Important Tips for Living in Colombia
1. Live in an apartment complex with a pool and a beautiful view.

2. Buy and try exotic fruit.

Even when you don't know what it is...

3. Enjoy the flora.

4. And the fauna... (especially when it's your boss's friendly schnauzer).

5. When you are homesick, make pancakes.

6. If that doesn't seem very adventurous, try them with mora sauce.

7. Buy a toaster oven so you can make chocolate cake.

8. And homemade cinnamon rolls.

9. Remember the cheapest place to buy wine is Alkosto.

10. Spend some quality time with Juan Valdez.

P.S. For those of you who just don't have enough Melody in your lives, check out my post on Medellin Living today!

2. Buy and try exotic fruit.

Even when you don't know what it is...

3. Enjoy the flora.

4. And the fauna... (especially when it's your boss's friendly schnauzer).

5. When you are homesick, make pancakes.

6. If that doesn't seem very adventurous, try them with mora sauce.

7. Buy a toaster oven so you can make chocolate cake.

8. And homemade cinnamon rolls.

9. Remember the cheapest place to buy wine is Alkosto.

10. Spend some quality time with Juan Valdez.

P.S. For those of you who just don't have enough Melody in your lives, check out my post on Medellin Living today!
Monday, May 10, 2010
Recipe: Jugo de Lulo
 Above: Lulo, a typical Colombian fruit that tastes like an orange, pineapple, and kiwi mixture.
As a vegan, there aren't a lot of truly Colombian foods that I can enjoy. (Okay, I love platanos, patacon, lentajes, yucitas, frijoles rancheros, and arepas slathered in avocado, but besides those...) Generally speaking, I don't make "Colombian" food at home. We get our fix (if we have one) at school, and I like to have a little more variety when I cook at home. However, the recipes I make at home that are completely Colombia are the various "jugos" or juices that are basically only found in this region of South America. I have numerous favorites, including mora (like a raspberry/blackberry) and maracuya but my absolute favorite is jugo de lulo. We specifically bought a blender and a wire mesh strainer solely for me to embark on juice-making adventures.
When we were still living with the principal (back in January), we might have had a maid. Okay, we had a maid. Her name is Dora and we love her. While we were living there, I had her teach me how to make jugo de lulo. Warren photographed us, and I'm pleased to bring you Dora's Directions for Jugo de Lulo.
Enjoy. And if you live in Colombia, make this. (In other countries, like Ecuador, lulo is called narajilla.)
1. Peel the fruit. The outside looks smooth but is a bit prickly, almost like a cactus, so don't touch your face while you are doing this. A ripe fruit should be firm but not too firm... almost like a plum. The inside will be slippery and feel like a kiwi.

2. Cut the fruit into chunks and put into the blender.

3. Add a little water and sugar. (About 1/8 cup of water and 1 teaspoon sugar for each piece of fruit you use. You can add more water or sugar to taste afterwards.) Blend for a few minutes.

4. Strain, obviously catching the liquid into a container under the strainer. Discard the seeds.

5. Pour into a pitcher and stir. Taste... add sugar or water if needed. There should be foam on top. Pose with finished product.
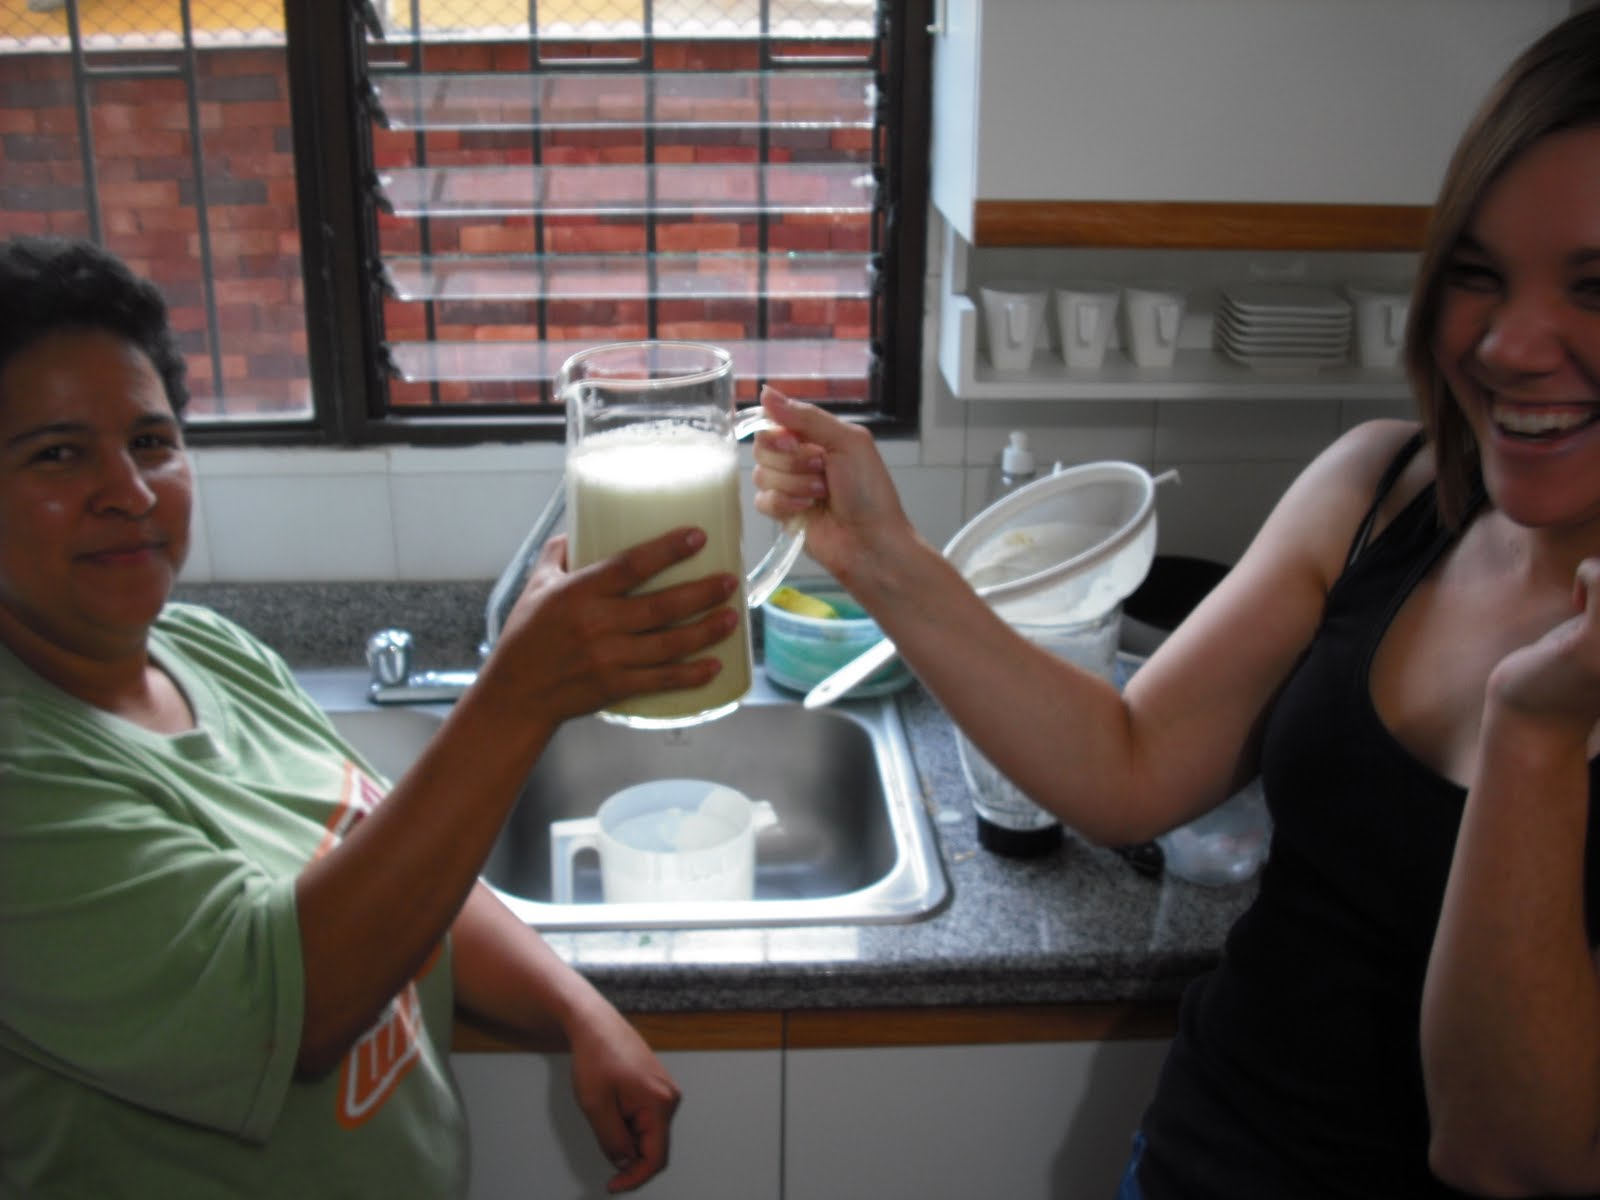
6. Serve and enjoy!

Yummy, healthy, and refreshing! Also, isn't Dora adorable?
Saturday, May 1, 2010
Graduate School and Black Bean Burgers

This is the first year EVER that May didn't mean the end of the school year for me, and I have to admit, it's a bit strange. Everyone else is studying for exams or finishing up with their teaching this year, and I am grading spelling tests and looking forward to 7 more months of teaching. The school year in Colombia begins in January and ends in December. That meant that this past year, I had to wait through an entire fall before I could begin my "real" job. I made good use of the time, working at my former job doing study abroad work and teaching English at a language institute, but it felt like prison anyway. I had to stay in my old college town and work at two part time jobs just to pay for my tiny little apartment. Not an ideal situation.
I think it was worth it, because I certainly enjoy my job here and I love my apartment and lifestyle in Colombia. The problem is that I'm looking at one more "semester" like I had last fall: next spring, I'll be waiting to *hopefully* start graduate school in the fall. If there's any reason to not teach in Colombia, the fact that the academic year is opposite to the American academic year is a strong one. It basically means that 1 year of my life is "wasted" while I wait.
Of course, I'm not REALLY going to waste an entire Jan-Sept period of time. I'm hoping to go to a Spanish immersion school and then find a job in whatever city I end up in for grad school.
Speaking of graduate school, can I just say I hate the process of even applying? When I went to Missouri State for my graduate certificate, I treated it as seriously as applying to Target for a summer job. I knew I would get in, I didn't have to take the GRE, and my only real concern was which assistant position I would get out of the three I applied for. (For the record, I took the one that paid the best and had the coolest job description.) Applying to graduate school for "real" is very intimidating. I want a very specific program (International Education and Development) and only about 5 schools in the entire USA offer programs that really fit my career goals. It's extremely intimidating, and I'm scared to death I won't get in to my top choices. Also, I hate standardized tests with so much fervor that whenever a school requires the GRE I automatically lower them on my list of top choices. (Take that, American University!)
Anyway, I'm probably going to be blogging a bit about graduate schools from this point on as I begin my search and application process. Most of my applications are due in January or earlier, so I'll be writing personal statements, begging for recommendation letters, and taking the GRE here. In Colombia. Oh joy.
On to happier things...
A Fabulous, Homemade, Entirely Vegan Black Bean Burger!

If there's anything I miss about the States, it's pre-packaged vegan faux meat. I know that's disgusting, but it's a lot of work to come up with protein every night from scratch. I miss my vegan sausage and chorizo, and I definitely miss a good vegan burger.
I created these on Wednesday and we ate them again on Thursday. Quick, simple, and very easy, they definitely satisfied my burger craving... and with no preservatives! here's the recipe:
Black Bean Burgers
3 cups pre-cooked black beans in their cooking liquid
1 small yellow onion
1 red pepper
2 1/2 teaspoons cumin
1 teaspoon garlic powder
2 tablespoons olive oil (or canola oil)
1 cup bread crumbs
1/3 cup cornmeal (not dulce)
2 tablespoons tomato paste (or 1 tablespoon paste and 1 tablespoon BBQ sauce*)
salt and pepper to taste
*Good and cheap BBQ sauce in Colombia: San Jorge brand, near the salsa de tomate
Directions:
1. Chop onion finely and sauté in 1 tablespoon olive oil over medium heat. Don't let them burn, just become translucent.
2. While the onion is cooking, dice a red pepper into small pieces and add to the onion. Sauté until tender.
3. While pepper and onion cook, mash black beans with a fork, potato masher, or in a blender or food processor. They don't need to be perfectly smooth, just broken and mashed a bit. I recommend blending them with about 1/2 cup of their liquid (or water/vegetable broth if you don't have cooking liquid).
4. Add half the onion and pepper mixture to the food processor and blend with the beans. (This makes them less likely to fall apart, but keeping half of the mixture intact makes them prettier.)
5. Dump the blended mixture into a bowl. Add the rest of the pepper/onion mixture and the tomato paste. Stir until everything is generally the same consistency and the sauce is well mixed.
6. Add the spices. You can be creative here--I love a good cumin-scented black bean burger and I eat it with avocado and salsa, but if you have liquid smoke or want to up the BBQ flavor and ditch the cumin, or whatever, really, feel free.
7. Add the breadcrumbs and cornmeal. Get your hands nice and dirty and mix it all together as if you are kneading bread.
8. Add the 2nd tablespoon of olive oil and mix again. If it seems dry, add more BBQ sauce, tomato paste, cooking liquid, or olive oil. (It doesn't really matter, just base it on what you want the burger to taste like. A good, fairly smooth salsa would be fantastic.) If you aren't vegan, I would highly recommend adding a beaten egg, but only because that's what most recipe books tell you to do.
9. When everything feels basically like raw hamburger meat (EWWW), start forming patties. I made mine about 1/3 an inch thick and about 4-5 inches across.
10. Cook over medium heat in a frying pan, flipping occasionally. Be careful when you flip them--if they are dry they might break apart.
11. Serve. We ate them on arepas (so Colombian of us!) with salsa or BBQ sauce or mustard or ketchup or... you get the idea.
Black bean burger on an arepa.

Warren is a fan.

Thursday, April 29, 2010
How I'm Coping with My Rainy Day: Two For One Special

Left: Chocolate Caliente and the rain that inspired it.
Please read my post below before you read this one... this is just a quick update!
I live in the coffee region of Colombia, therefore, I drink coffee in the mornings, and so do all my co-workers. The only "hot drink" variation I ever see is agua panela (which I can post about another time) and sometimes, just sometimes, the health conscious at school drink hot tea. Kids might drink hot milo (kind of like Nesquik or Ovaltine), but primarily my fellow Risaraldans drink coffee. And lots of it.
In various other regions of Colombia, coffee is second in popularity to chocolate caliente (hot chocolate). Not the typical, sweet Swiss Miss-style we drink in the United States, but pure melted chocolate, mixed in water or milk, with a tiny bit of sugar. It's dry and bitter, but just as popular as coffee, especially among working-class men. (Nothing like a cup of cocoa before heading out to build a new apartment or drive a bus!)
By a chance accident (I needed chocolate, Warren doesn't understand the words "unsweetened") we had a package of Luker brand chocolate at the apartment. On this cold, rainy day, I decided there wasn't much that I would enjoy more than a cup of hot chocolate. So, I did my best.
It wasn't as sweet or smooth as my hot chocolate at home, but it definitely warmed me up and gave me a happy dose of endorphins.
Below: Chocolate Caliente

I've included two recipes below, one from the Luker package itself (with my notes about how I prepared it) and one from my cookbook Secrets of Colombian Cooking (by Patricia McCausland-Gallo), which was a Christmas present from my brother Billy.

Luker Recipe for Chocolate Caliente
Ingredients
Unsweetened chocolate (should be pure: only 100% cocoa mass)
Agua Panela (if you are Colombian) or water
Sugar (probably 1/2 tablespoon per cup)
Unsweetened soy milk if you're vegan, regular milk if you aren't as cool as me (just kidding)
Directions:
In a saucepan, warm up water or agua panela (1/2 cup for each cup you want to make). Add a square (7.8 grams) for each cup you want to make. Stir until melted. Add a tablespoon of sugar for each cup you want to make. Stir until dissolved. Remove from heat. Add 1/2 cup of milk for each final cup you want. Beat with a whisk (the Luker package suggests putting it into a blender to make it frothy, but that seemed totally unnecessary.) Warm thoroughly and then serve. Don't let this boil, ever. Also, stir often so it doesn't burn/stick on the bottom of the saucepan.
My additions: I added a pinch of salt, a teaspoon of vanilla, and extra chocolate squares. I then tasted it and added sugar until it tasted less bitter. (About another teaspoon per cup.) If you are using Baker's chocolate in the U.S.A., I would estimate that 1 Luker square equals 2 Baker's rectangles.

Chocolate Caliente, from Secrets of Colombian Cooking (McCausland-Gallo, pg 208)
Ingredients
4 ounces sweetened table chocolate (vegans-don't use milk chocolate!)
4 cups milk or 2 cups water and 2 cups milk (sub soymilk if you are vegan)
2 tablespoons sugar
Directions:
1. Place the chocolate, milk, and sugar in a pot over medium heat. Bring to a simmer (but don't let it boil) for about 5-7 minutes, or until the chocolate is very soft.
2. Remove from the heat and with a whisk stir rapidly and continously until hte chocolate forms a lather or foam.
3. Serve and enjoy!
A very rambling post with a side of chili.

Above: Not my best picture, as it was taken on the bus, but here's what I've seen every day since the beginning of April: clouds, rain, and more clouds and rain. Also, this is one of the poor areas of Cuba. Please read on for more about why I posted this photo--I need your help!
No one commented or voted "interesting, etc." on my last post... should I take it as a hint that you don't want to read recipes? Or am I the only person reading my blog? If you are a secret reader out there, I would really love it to hear your comments. When you comment or vote interesting, funny, or cool, it lets me know that you liked the post, and I'll know to post on the same topic or use the same idea again. Plus, you must remember that I live a fairly lonely life here in Colombia (although my 17 students informed me that they were my 17 closest Colombian friends yesterday), and when you comment or vote, it makes me feel more connected to people at home. You don't need a blog or a Google account, either. So... you secret readers out there... please let me know what you want to read about!
Okay, so the real part of the post (when I don't lecture my readers):
Onto a more interesting (and vastly more important subject), the photo at the top of this post (as bad as it is), is of a poor neighborhood in Cuba, a barrio in Pereira. I'm posting it to help inspire you... I need your help. I'm trying to come up with ideas to engage my students in a fight against poverty. I want to instill a desire to help and aid the lower classes in Pereira in my students. Teaching wealthy students frequently makes me guilty in this country, but I also realize that my students are the ones that have the ability to make a difference. So, I would like to hear your ideas. How can I teach my students to care about the plight of others, and what kind of projects or activities could we do to help the poor populations? I would specifically like them to help kids their own age. If you have any ideas AT ALL, please comment or send me an email. Thanks for your help!
And now: Why I hate the rainy season.
It has rained here continuously every day, all day for 2 weeks straight. The most sunlight and warmth we've gotten has been little snippets for an hour or two when we are lucky. Usually it's just cloudy and rainy, with a break for 30 minutes here or there. I've been bragging about Colombia's weather for months, but I'm so over it. Until we've moved past this constant downpour, I'm officially NOT a fan of Colombian weather. I know I sound like a big baby, but you have to remember that LPV is an OUTDOOR school. We don't have hallways or doors.. it's all open air. That means that every time it rains, all my posters fall down because the air is so moist, the desks are covered in water because it drips through the guadua shingles, all the bugs come inside to get dry, the electricity frequently goes out, my classroom and my students are covered in mud and water, and my students go CRAZY because there's no where they can go to play except our classrooms because they are the only covered areas! I love the school and it's environmentally friendly/hippie outlook, but I'm definitely not handling the rainy season well. Unfortunately, I've got around 1 more month of it left AND there's another one coming in a few months. Again: I'm so not a fan.
What I am a fan of is a hot bowl of chili when it rains.

Above: Chili, our dinner on Monday AND Tuesday (we had leftovers!)
There are few things in the world that scream American to me as much as a hot bowl of chili on a rainy, cold night. I made chili Monday and was incredibly pleased with how it turned out. Why? (I mean, it's just chili, right?) I was scared it wouldn't work because I can't find CHILI POWDER in Colombia. How is that even possible?
Anyway, here's the recipe. It's certainly not anything like my American recipe, but if you're in Colombia and want a hot bowl of chili, this will definitely satisfy your craving.
Colombian Chile
Ingredients:
3 cups of speckled beans (or black, kidney, pinto, etc. Feel free to mix if you have different types of prepared beans), pre-cooked (see directions below the recipe)
1 red onion
1 tablespoon olive oil
3 cloves of garlic
1 or 2 red peppers
4 tomatoes
4 tablespoons of tomato paste (pasta de tomate) (you can use less or more if you need... if you don't have any, use ketchup!)
water as needed
1 teaspoon yellow mustard
Spices: Cumin (comino), pepper (pimenta), salt (sal), ajo (garlic powder), oregano... I used a mix called "Salsina", a product of El Rey spices, that was garlic, cumin, and pepper mixed.
Directions
1. Chop onion finely and sauté in olive oil until the onions are translucent.
2. While the onion is cooking, mince garlic. Add to the onions.
3. While the garlic is cooking, dice the red pepper. Add to the garlic and onions.
4. Dice tomato and add it to the vegetables.
5. Cook until the red pepper is tender and the tomato is almost mushy.
6. Add beans and liquid from cooking the beans. Add water if needed... the beans should be floating and the mixture should be easy to stir (not stew like, soup like!).
7. Add tomato paste and up to a tablespoon of yellow mustard. Stir until the mixture is well blended.
8. Bring to a boil.
9. When it begins to boil, turn heat down a bit. Stir. Add spices. These should be to taste, but to begin I recommend: 1 1/2 teaspoon cumin, 1 teaspoon salt, 1 teaspoon pepper, 1/2 teaspoon garlic powder, and 1/2 teaspoon oregano. If you are using "salsina", you can use it to replace the garlic powder and pepper, but you'll still need 1 teaspoon of cumin.
10. Let it cook for about 30 minutes on medium heat. Stir often so it does not stick to the bottom.
11. After about 30 minutes, taste the sauce. I added more cumin, pepper, and salt, but you should add as you think you'll like. You might want more mustard--it helps a lot if you like it.
12. Cook for 20 minutes or more over low heat.
13. Serve with your favorite crackers, and if you are Warren, cheese!
How to prepare dried beans (almost any type): Dump beans into a bowl, clean out and remove anything that looks like it doesn't belong, and cover with 2 times the amount of water as beans (so, 1 cup of beans, at least 2 cups of water). Soak overnight (or at least 8 hours). Drain and rinse after 8+ hours, and dump beans into a soup pot. Cover with the same amount of water. Bring to a boil, turn heat down but keep them at a low boil. Cook for at least 1 hour--may take longer, just test them every 30 minutes or so. They should be firm but easy to smash. When they seem like they are almost done, salt them a bit (a teaspoon or a bit more is good). When they are finished, store them in a plastic container in their cooking liquid in the refrigerator.
Wednesday, April 28, 2010
Barely American Learns to Cook!

Above: Our dinner on Sunday night... Recipe Below!
First of all, I already know my way around a kitchen (but I'm always learning new things), but this blog has never served as a food blog before, hence the title. However, the only blogs I ever read before I started my own were vegan blogs, and they are still my favorite blogs to read and my writing inspiration.
Sidenote: I decided to post these recipes for a few reasons. 1) To show what we eat here. 2) I like to write and think about food. 3) If anyone is living in Colombia or South America, I think it can be hard to find ways to cook "American" food, especially for vegans/vegetarians. In case anyone ever stumbles onto my blog because they are vegan in South America, maybe this will help.
Background: I was incredibly lucky to find 3 packages of fresh, full basil at Exito on Sunday. In keeping with my desire to save money (each package cost 650 pesos, roughly 32 cents), I used only half of one package on Sunday making our favorite dish: bruschetta. Warren and I usually eat bruschetta at least once a week. It's very home-y and satisfying, and the flavors are definitely not Colombian, so it's a good variation from school lunches. Along with our bruschetta I threw together a quick dish of Italian-style beans. I didn't exactly know what I was doing, but I knew I needed protein and I had already soaked and cooked the beans. As a future warning for these and all other recipes to ever appear on this blog: I don't follow recipes or cookbooks, except sometimes when I'm baking. All recipes to appear are created by me, and I don't measure, I just eye-ball it. (I learned from my mother.) That said, make sure you taste things as you cook them if you follow my recipes.

Melody's Bruschetta
Ingredients
1 large French or Italian style baguette (in Colombia, the best ones are at Exito and Carrefour)
4-6 medium red tomatoes(I remove the hard white part directly underneath the stem, too.)
baby tomatoes if you have them (we had some leftovers)--any amount from 1/4 a cup to 2 cups will work in this recipe
4 cloves (not bulbs) of garlic
Tomato paste (Found near the ketchup and called pasta de tomate in squeezable packages)
salt
pepper
fresh basil or dried oregano (basil is better!)
olive oil
Directions:
Before you begin, rinse the tomatoes and fresh basil in cool water.
1. Smash and chop the garlic cloves finely. Sauté over low heat in 1 tablespoon olive oil until the garlic just starts to brown.
2. While the garlic is cooking, dice the medium-sized tomatoes. Add the tomatoes. If you are using any baby tomatoes, you can add them whole). If the garlic begins to turn brown before you are finished with the tomatoes, remove the pan from heat. (Don't let the garlic actually turn brown--you just want it to start to turn brown.)
3. After you add the tomatoes, turn the heat to medium heat. Stir frequently so that the tomatoes do not stick to the pan. Let the water cook out of them so that they are mushy. If you used baby tomatoes, you want them to "pop"--there should be a place where the skin on them breaks, but they should disintegrate.
4. When the tomatoes are finished cooking, remove from heat and stir for about 30 seconds. Add the tomato paste. How much is up to you--at least 2 to 3 tablespoons, but if you add more you'll have more tomato-y goodness for your bread. It should look just a little bit thicker and chunkier than a chunky spaghetti sauce. Return to heat, simmer on low heat.
5. Slice the bread into 1 inch (or smaller) slices. If you have a toaster oven or toaster, you can toast the bread that way. If you don't, simply heat a frying pan over medium heat. You can add olive oil to it, but it's not necessary (and adds calories). Toast the bread on each side in the pan for about 1 minute--just watch it, don't let it burn.
6. Add salt and pepper to taste (about 1 teaspoon salt and 1/2 teaspoon pepper), stir quickly.
7. If you are using fresh basil (and you should), chop up between 1/4 of a cup to 1/2 of a cup and add it to the tomato mixture. Stir quickly and then turn off heat. Stir tomato mixture for another minute.
8. Finally, spoon tomato mixture over the toasted bread. If you aren't watching your weight, you can dip the toasted baguette slices in olive oil first.
ENJOY!
Italian-Style Beans
Ingredients
1 cup of pre-soaked and pre-cooked speckled beans (white beans would work too)
2 cloves of garlic (1 1/2 teaspoons garlic powder)
1 tablespoon olive oil
1/2 teaspoon thyme or 3 tablespoons chopped fresh basil (basil is better!)
Salt and pepper to taste
Directions
1. Chop garlic finely if you are using fresh garlic.
2. Heat olive oil in a small sauté pan over low heat. Add garlic (if you are using fresh) and sauté for about 1 minute.
3. Add beans. Turn up the heat just a bit. Stir them around so they are coated with olive oil.
4. If you are using garlic powder, add it now. Also add the salt and pepper (about 1/2 teaspoon salt and a pinch or two of pepper.)
5. Add the basil (or thyme) and stir.
6. Cook about 5 minutes total (the beans should brown just a bit but not burn or get very dry).
Serve with something yummy--but they are addicting on their own!
Subscribe to:
Posts (Atom)
